In the digital age, the experience of users is what sets the winners apart from the crowd. The UX design process is the labyrinthine road that leads to an impeccable user interface, fluid user experience, and an overall successful product. Yet, many are unsure or confused about what exactly this journey entails. So, if you’ve ever wondered about the stages of UX design, you’re in the right place! This comprehensive guide will walk you through each meticulous step, offering you invaluable insights into the grand world of UX design.
The Pre-planning Stage
Before diving into the specifics of the UX design process, it’s crucial to emphasize the importance of preparation. Think of it as the soil in which the roots of your design will take hold. Establish the scope, lay down the objectives, and identify the constraints. This includes understanding your target audience and the problem that your design aims to solve. Additionally, competitors’ analysis at this stage provides a goldmine of insights.
The first step of the design process usually begins with an initiation meeting where the stakeholders and the UX design team come together. They align their expectations, outline the deliverables, and set the timeline. Following this, a thorough market research is conducted to understand user needs, preferences, and pain points.
During the pre-planning stage, several methods are employed to gather information, such as surveys, interviews, and observational studies. Don’t rush this step; the more comprehensive your research, the more it will benefit you in the subsequent stages.
No UX design process is complete without a budget. Ensure you are clear about the financial resources available and adjust your strategies accordingly. If you’re working on a tight budget, prioritize the essential elements of the design.
Moreover, sketching a UX design process diagram could serve as a roadmap, helping everyone in the team understand the flow and stages involved. It visually presents the intricate weave of tasks, dependencies, and milestones.
Defining User Personas
Following the preparatory stage, the next step is creating user personas. This is a semi-fictional representation of your ideal user, based on the data gathered during the pre-planning stage. A well-crafted persona incorporates behavioral patterns, objectives, and the observed needs of the target audience.
User personas serve as a guide for every step by step UX design process. They help to maintain focus on the user’s needs throughout the project. Creating detailed personas also encourages empathy among the design team, making it easier to solve problems from the user’s perspective.
When formulating user personas, consider the demographic and psychographic aspects. Dig deeper into their lifestyle, needs, and preferences. You can create several personas if your product serves different segments of the audience.
Notably, personas should be kept up to date as user behaviors and market dynamics change. While your initial persona will be based on researched assumptions, it should be refined as you gather more real-world data.
Also, don’t underestimate the power of negative personas. These are profiles of users who you do not want as your customers, and they help you narrow down the focus to a more relevant audience. Thus, defining user personas lays the groundwork for the steps in UX design that follow.

Information Architecture
The skeleton of your UX design, otherwise known as information architecture, is what comes next. It’s the organizing, structuring, and labeling of content within an app or website. The key here is to ensure that users can easily find what they’re looking for.
Information architecture involves creating a sitemap and deciding how the data will be structured. Whether it’s a hierarchical, sequential, or matrix structure, the goal is to optimize the user’s journey through your digital product. Wireframes and prototypes are often used to visualize this structure.
One of the essential tools for planning information architecture is card sorting. This involves placing information or features on cards and asking users to categorize them. The insights obtained can prove invaluable for organizing your website or application logically.
A consistent nomenclature across all platforms is crucial. It provides a seamless experience and makes it easier for the user to navigate through your product. Also, pay close attention to the search functionality. A well-implemented search can make up for other navigational deficiencies.
Lastly, analytics tools can help track user behavior, indicating the success of your architecture. If users are dropping off or taking too long to complete tasks, you may need to revisit this stage of the UX design process steps.
Ideation and Brainstorming
Now, let’s stir up the creativity. Ideation is the stage where you generate a plethora of ideas that could potentially solve the problems identified earlier. Use techniques like mind mapping, brainstorming, or the Disney method to look at problems and solutions from different angles.
Brainstorming sessions should be inclusive, allowing team members from different departments to contribute. A multidisciplinary approach often leads to more innovative solutions. Use whiteboards, sticky notes, or digital platforms to collate and organize these ideas.
The objective of the ideation stage is not to find a single solution, but to generate as many options as possible. You never know which idea could offer an unexpected breakthrough in your UX design cycle.
After a productive brainstorming session, the team can categorize and prioritize the ideas. Some ideas may be excellent, but not feasible due to budget or technical constraints. Having a wide selection of concepts provides the luxury of choice.
At the end of the ideation process, you should have a list of actionable items. These will form the basis for your prototypes and, eventually, your final design. Remember, creativity is a resource; tap into it generously.
Sketching and Wireframing
Transitioning from conceptual ideas to tangible designs involves sketching and wireframing. A sketch is a quick hand-drawn layout of your interface. On the other hand, a wireframe is a more detailed, often digital, representation of the design. Both are essential elements in any UI/UX design process.
While sketching, focus on the layout and placement of elements. Don’t fret about the details; rough sketches are enough at this stage. Your primary goal is to visualize how the components interact with each other.
Wireframes add a level of sophistication. They provide a clearer picture of what the end product will look like, albeit without colors, graphics, or fonts. There are many tools available for wireframing, such as Sketch, Adobe XD, and Axure RP, to name a few.
During this phase, usability is a top priority. Ensure the interface is intuitive and that users can complete tasks efficiently. This is an excellent time to refer back to your user personas and align the design with their needs and preferences.
Collaboration between UX and UI designers is vital at this stage. While UX designers will focus on the user journey and navigation, UI designers bring the aesthetic elements into play. Hence, wireframing serves as a bridge between the conceptual and visual aspects of design.
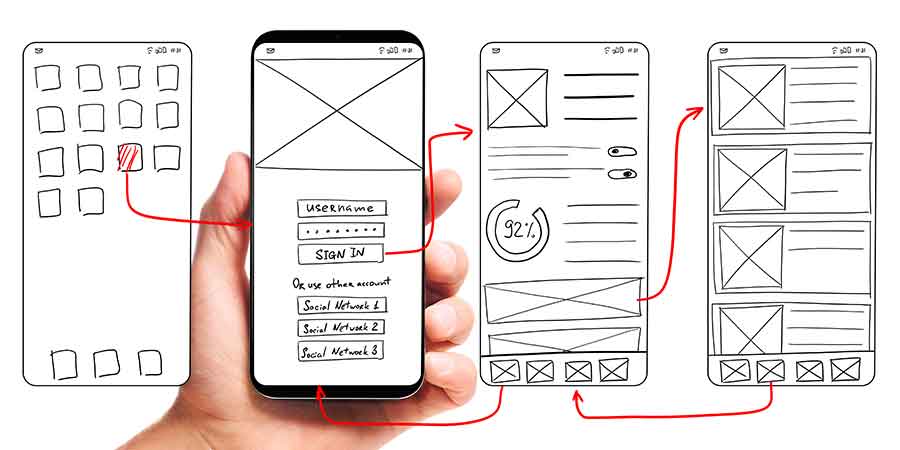
Creating Prototypes
Prototyping is like the rehearsal before the grand premiere. It’s an interactive model of the end product, designed to showcase a design’s functionality and to test its usability. It’s an essential step in the UX design process that allows designers, stakeholders, and users to understand the product’s flow, interactions, and layout.
Prototypes range from low-fidelity versions, like paper prototypes, to high-fidelity versions that are almost identical to the final product. Low-fidelity prototypes are quick to produce and are particularly useful for early-stage testing. High-fidelity prototypes, however, offer a more realistic user experience, enabling more accurate user testing.
Consider employing tools like InVision or Framer for creating interactive prototypes. These platforms enable you to add real-time adjustments based on feedback, thereby speeding up the iteration process.
Once the prototype is ready, it goes through several rounds of user testing. The objective is to identify any issues in the design that may have been overlooked. Watch how users interact with the prototype; their behavior will offer you invaluable insights.
Iterations are a crucial part of this stage. Based on the feedback, make the necessary tweaks to the prototype. Multiple iterations may be needed until the design meets the desired criteria, so patience is key.
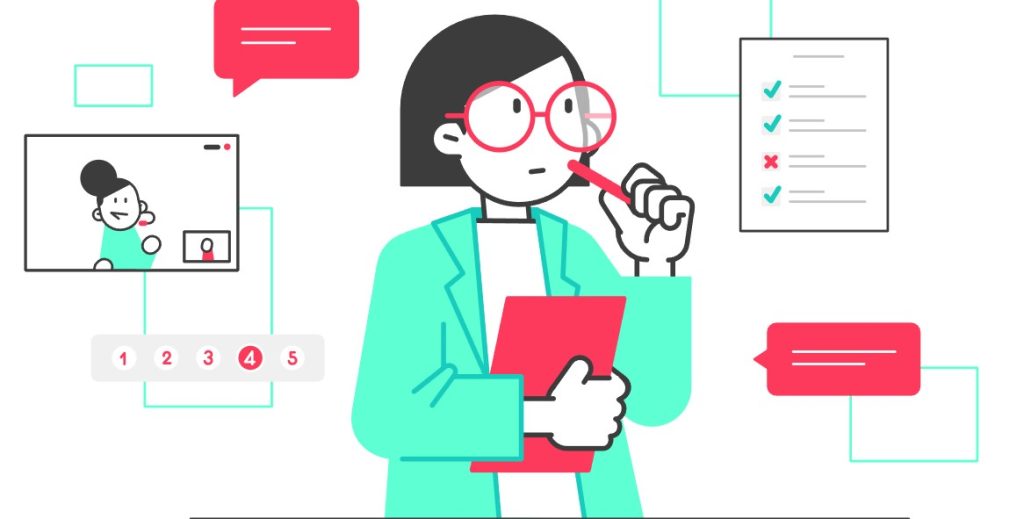
Usability Testing
We have a prototype, but how effective is it? Enter usability testing. This involves real users completing tasks on your prototype, while you observe and note any difficulties or bottlenecks they face. This step in the UX design process is vital for fine-tuning the end product.
Various methodologies can be applied in usability testing, such as A/B testing, remote usability testing, and one-on-one sessions. Each method has its advantages and disadvantages, and the choice often depends on the project requirements.
Remember, testing should be iterative. As you make changes based on feedback, retest to ensure that those changes have resulted in improvement. This cyclic approach is what we refer to as the UX design cycle.
While it’s tempting to assume you know how users will behave, it’s often surprising how differently people interact with a product. Sometimes, issues arise in areas that you assumed were perfectly designed. Usability testing helps in identifying these hidden pitfalls.
After the usability testing, analyze the data, look for patterns, and implement the necessary changes. This is also an excellent time to check whether the design meets the accessibility standards. After all, an inclusive design is a better design.
Visual Design and UI
Now that you have a usability-tested prototype, it’s time to paint the canvas. Visual design is where UI (User Interface) comes into play, and it’s an integral part of the overall UI/UX design process. This phase involves choosing the right color schemes, typography, and graphical elements that align with the brand’s identity.
Remember, every visual element should be designed with the user in mind. The color scheme should be pleasant yet attention-grabbing. The typography should be legible and accessible. Graphic elements like icons should be intuitive. It’s not just about making things look good; it’s about enhancing the user experience.
One often overlooked aspect of visual design is micro-interactions. These are small animations or design elements that guide the user or provide feedback. For instance, a button changing color when hovered over or clicked can significantly improve user engagement.
Also, consistency is crucial. Make sure the visual elements remain uniform across all platforms and devices. Responsive design ensures that the visual elements adapt gracefully to various screen sizes.
Lastly, involve your developers in this stage. The handoff between design and development is often fraught with misunderstandings and misinterpretations. Keeping an open line of communication ensures that your beautiful designs are translated accurately into the final product.
Development Handoff
The development handoff is the passing of the design baton from the designers to the developers. This stage is critical because even a brilliant design can falter if not implemented correctly. Adequate documentation, complete with specifications and assets, is crucial for a smooth transition.
Version control is essential at this stage. Ensure that everyone is working on the most recent iteration to avoid any last-minute chaos. Tools like Zeplin or Avocode can streamline this step of the UX design process by creating a collaborative environment for both designers and developers.
Also, incorporate a review loop. As developers start implementing the design, regular check-ins are crucial for ensuring that the design vision is being accurately realized. This is a collaborative process, and both designers and developers should be open to feedback and adjustments.
Usability doesn’t end with the design phase. Developers should also consider the load times, smoothness of interactions, and responsiveness when building the product. These factors have a significant impact on the user experience.
Finally, maintain an open channel of communication between the designers and developers throughout this stage. Frequent discussions can resolve potential misunderstandings, ensuring that the end product matches the original design as closely as possible.
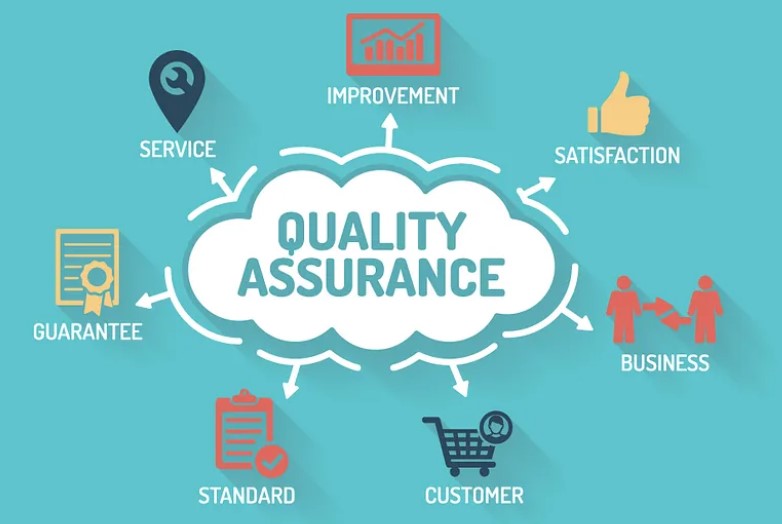
Quality Assurance
Once the development is complete, it’s time for rigorous quality assurance (QA) testing. QA is an essential step in the UX design process, ensuring that the product is free of bugs and works smoothly on all devices and browsers.
Incorporate both manual and automated testing methodologies. While automated tests can quickly identify broken elements or performance issues, manual tests provide insights into the user experience.
Also, make sure to test the product under different conditions. This includes varying network speeds, different devices, and operating systems. You want to ensure that all users have a seamless experience, irrespective of their setup.
Localization testing is also crucial if your product is intended for a global audience. Check that the language, currency, and other localized elements are displaying correctly.
Don’t overlook the importance of load testing. This helps to understand how the product performs under peak loads. Any bottlenecks identified at this stage can be corrected before the launch, thereby ensuring a smooth user experience.
Post-launch Analytics and Iteration
Congratulations, your product has been launched! But the UX design cycle doesn’t end here. Post-launch analytics are crucial for understanding how real users are interacting with your product in their natural environment.
Track key performance indicators (KPIs) that align with the goals set at the beginning of the design process. Use tools like Google Analytics to gather data on user behavior, engagement rates, and conversion metrics.
User feedback is invaluable post-launch. Encourage users to provide feedback through various channels, be it social media or directly through the application. This information helps identify any areas that may require improvement or modification.
Don’t just collect data; act on it. If you notice particular elements or features that aren’t meeting expectations, return to the drawing board. UX design is an iterative process, continually evolving based on user needs and feedback.
Regularly update your user personas based on real-world data. As your product matures, so will your user base. Keep an eye on changing user behaviors and preferences to ensure that your design remains aligned with your audience’s needs.
Conclusion
The UX design process is far from a linear journey. It’s an intricate dance that involves multiple stages, each with its own set of challenges and opportunities. Whether you’re a seasoned designer or just dipping your toes in the field, understanding this process is the first step towards creating products that not only look good, but feel great to use. From the initial research to post-launch analytics, each stage of UX design plays a crucial role in crafting an exceptional user experience. So go ahead, embark on this exhilarating journey and turn your visions into functional, user-centric designs.